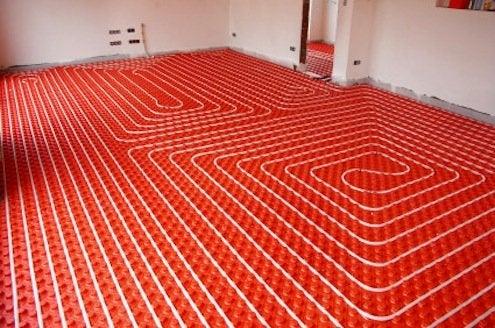
It's a cold winter's morning as your creep into the bathroom. But you're not greeted by a frigid floor—instead, soothing heat seeps up from beneath you. Good thinking installing that in-floor heating system.
A variety of in-floor heating systems are available. Some use hot water that runs through flexible tubing. This can be used when installing new floors, and it's also an option when the floor covering is already installed but you have access to the underside of the subfloor. You can install the plastic tubing to the underside of the floor. The drawback to this system is you need a boiler or water heater capable of providing enough hot water.
Another option is a radiant heat system, which uses electricity. These are easier to install than water systems and less expensive, costing about $70 for a 3 ft. x 20 ft. section, without the thermostat. The systems typically consist of thin heating cables integrated into a plastic mat, which is installed between the subfloor and the floor covering. When the cables are turned on, they work like an electric blanket to warm up the floor.
Pick Your Floor Covering
SunTouchRadiant heat is commonly used with ceramic, marble, or stone floors, which we cover here. In-floor heat can also be used with some wood flooring. Engineered wood is the best choice because it can handle the changes in temperature with minimal shrinking and expanding.

Measure the room and make a sketch. Determine where you want the heated cables to be placed in the room. Radiant systems should not run under or even butt against cabinets, the bathtub or shower enclosure, a whirlpool, or toilet. Make an at-scale sketch of the room to share with the radiant floor supplier or retailer, then buy the materials to meet your room dimensions.
Install the Underlayment
SunTouchInstall cement backer board over the subfloor, just like you'd do for a regular tile job. (This article explains how to cut it.) Cement board is a better choice than plywood because the latter can expand and contract as the in-floor heat is turned on and off. This movement in the plywood can cause the grout to crack. Adhere the backer board to the subfloor with thin-set mortar. Trowel on the mortar with a 1/4-inch notched trowel.
Place the cement board in the mortar with the rough side up. Screw it down with 1-1/4-inch cement board screws, which are corrosion resistant and have heads that sit flush with the cement board surface. Drive a screw about every 8-inches. Keep the cement board 1/4-inch from walls. Once the cement board is installed, cover the seams with mesh cement board tape, then spread thin-set mortar over the top with a wide putty knife or flat trowel. This gives you flat surface.
Secure the mats to the cement board. Unroll the heating mat on the floor. Place the mat so the cable connection is near the wall where the thermostat will be located. Some mats have double-sided tape so you can stick the mat to the floor. Otherwise, use a hand stapler to tack the mat in place. By ultra careful to only staple the plastic part. Do not staple the cables. If needed, you can cut the plastic, and only the plastic, with a utility knife or scissors. Make certain the cable lies flat and does not overlap itself.
Run the Power
If you don't feel comfortable working with electricity, you'll need to call in a pro for this part of the job. For a small room, it may be possible to tap into an existing circuit to power the heated floor. The circuit should not already having lighting, an exhaust fan, or a whirlpool pump on it. The heating cable must be GFCI protected. In most cases, you'll need to run a new circuit on a 15 or 20 amp breaker. Install the circuit, then install the thermostat that turns on the heated floor. Connect the thermostat to the floor cable.
Lay the Tile
SunTouchAll that's left now is installing the tile. This story offer step-by-step instructions for a quality tile job. Installing the tile over the radiant floor system is no different from installing it over cement board without the floor system. You simply trowel the thin-set mortar over the heating mat, then lay the tile. Just be careful so your trowel doesn't catch and pull the mesh or clip the cable. You'll need to place the heated floor sensor somewhere in the floor and tile over it. The sensor turns off the heat when the floor reaches its programmed temperature.
Wait a Month
You'll be anxious to turn on the heat, but you have to wait 28 days. That's because the mortar has to completely cure first. Once the wait period is over, turn on the heat, kick off your shoes, and reward your feet with comforting warmth.
All-in-One Option
Another option is to install a self-contained system like Warmboard. It's available in two varieties. Warmboard-S is a structural subfloor and radiant panel in one. It is designed to be used in new construction, and is regularly installed directly over a floor joist. Warmboard-R is a smaller, thinner panel ideal for remodels and retrofits. Warmboard-R is installed over an existing subfloor or slab, but is also used in walls or ceilings when the original floors should remain intact.
With a system like Warmboard there is no waiting and once your floor is down you are ready to go. The cost is higher, but savings in time and the performance benefits of an integrated system, may be worth it.
This content is created and maintained by a third party, and imported onto this page to help users provide their email addresses. You may be able to find more information about this and similar content at piano.io